Ecstatica II
| a game by | Andrew Spencer Studios |
| Platform: | PC (1996) |
| Editor Rating: | 7/10, based on 1 review, 3 reviews are shown |
| User Rating: | 9.3/10 - 3 votes |
| Rate this game: | |
| Updated: | Dec 30, 2025 |
| See also: | Action Games, Horror Games, Puzzle Games, Third-Person Shooter Games |

Fairy Tales. What Do You Think about when someone mentions fairy tales? Chances are, you think about Csoppy' stuff. Happy little elves. Simpering, beautiful princesses. Magic rings and wishing wells. Flowers, forests and the Seven Dwarves. A nonsensical pantomime of Disney-scented cutesiness, designed to placate and pacify pre-school children.
Now that's all well and good... but don't forget about the other side of fairy tales. The mean side. The horrible nightmare side. Ugly sisters. Wicked witches stuffing live children into ovens. Voracious wolves swallowing kindly old ladies whole. Fee, fi, fo, fum, I smell the blood of an Englishman...
The fact of the matter is this: while the majority have happy endings, you'd be hard pressed to find a fairy tale whose central premise doesn't revolve around an act of spectacular cruelty. Face it. They're vicious. Vicious, cruel and altogether brutal.
So, then. Welcome to the fairy tale world of Ecstatica II.
The way things are
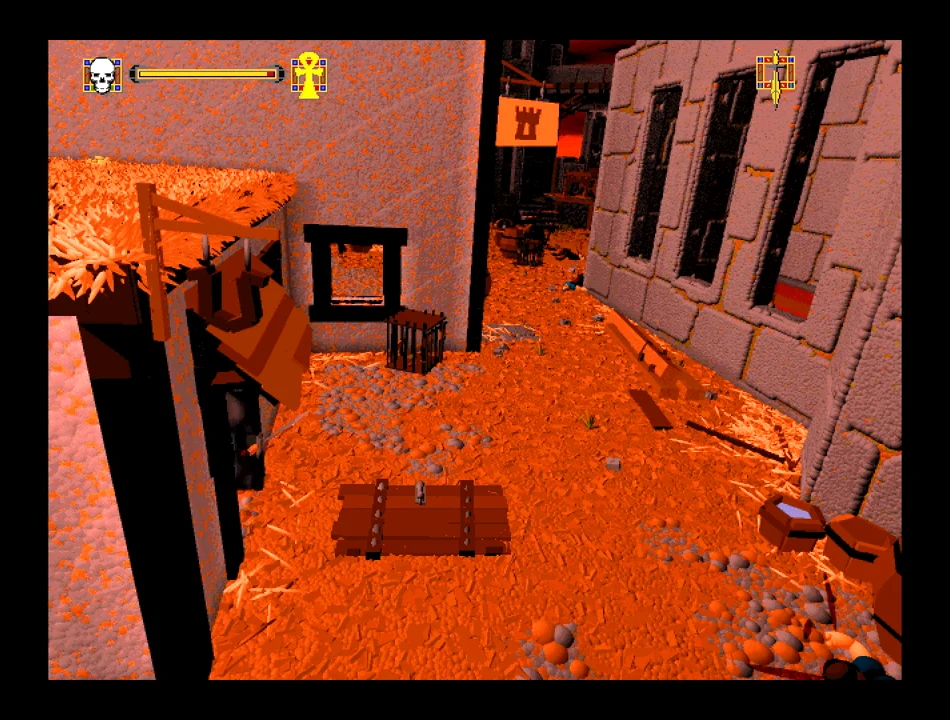
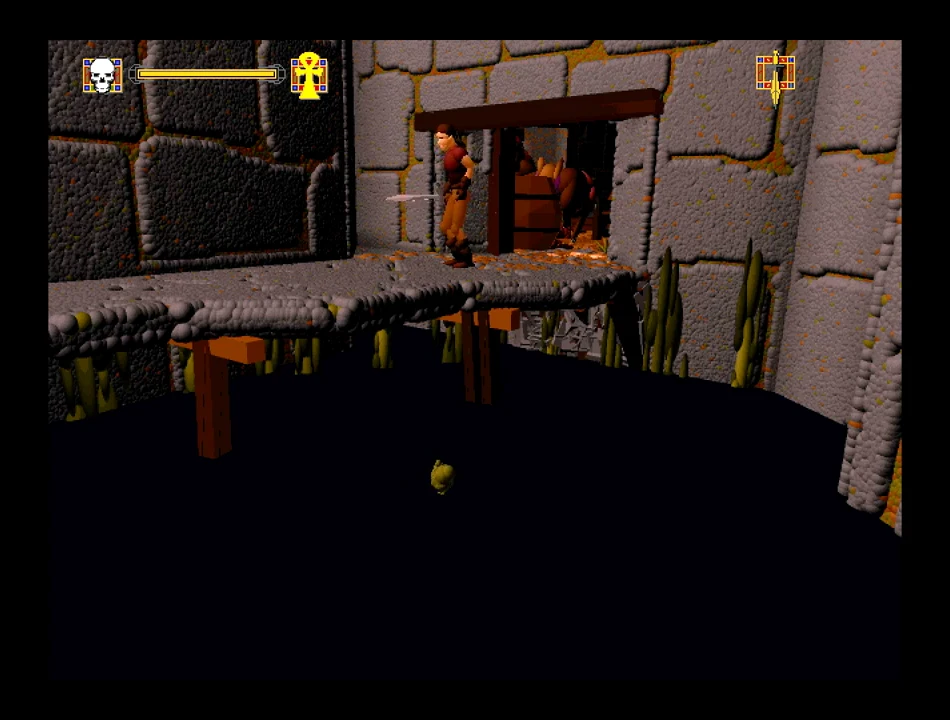
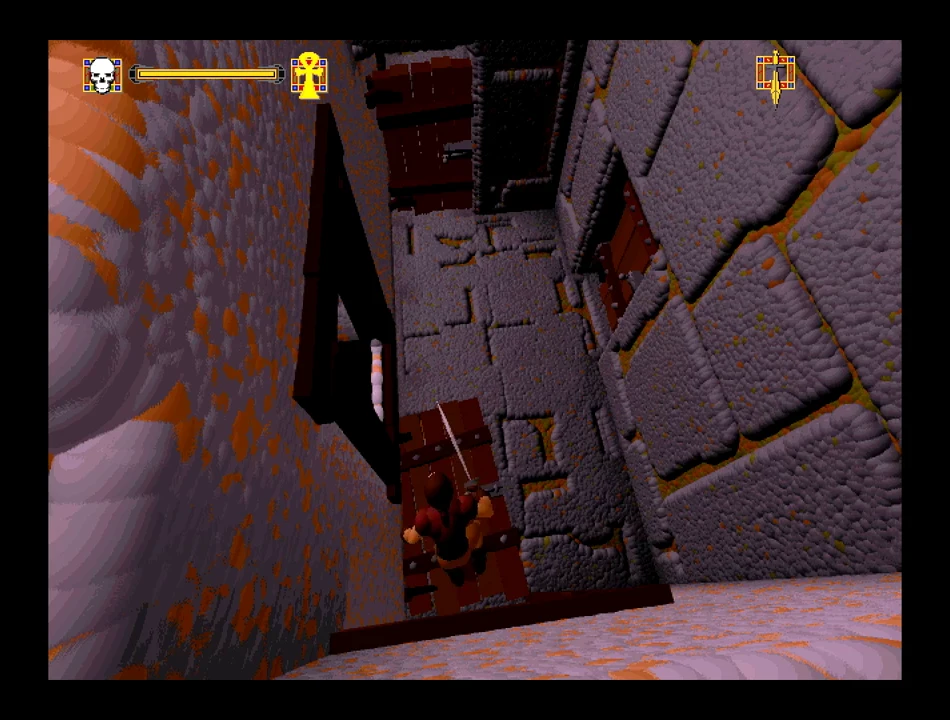
Ecstatica II is superb. Gameplay-wise, there are parallels with Alone In The Dark and Resident Evil - although it's far larger, nippier and better looking than either of them. It's also considerably more action-packed: once the opening sequence has played out, you won't get a single moment's peace. It's never, ever boring. Aside from all the constant fighting, there's an incredibly complex (and dangerous) series of tasks to work your way through. The playing area is immense - I can't think of another game in this genre which comes close in terms of size - or variety. Speaking of variety, since there's plenty of that as you travel from location to location, simply exploring your surroundings is rewarding in itself. It should keep you going for weeks. It's one of those games where there's always something new to discover around the next corner - and by my reckoning it's got over ( fifteen hundred thousand such corners. We're talking huge.
One of the things that made the original Ecstatica such a delight to play was the shocking regularity with which bizarre and unexpected events occurred (my favourite being the table that suddenly sprang to life, raining blows upon the stunned player, yelling abuse in a Northern English accent). Ecstatica II also has its fair share of surprises (most of them extremely nasty ones), which I don't really want to give away here. Put it this way: you'll be saying (or thinking) things like ooh!, and what's that?, and holy shit! with startling regularity.
Coming over all CPesci..
So it's damn good fun - but it isn't simple. Ecstatica II is not an easy game. It is a bastard. A hard-nosed, brutal, unyielding bastard. If this game were a person, it'd be Joe Pesci in full-on Goodfellas psycho-nutter mode, stabbing you in both eyes with a fountain pen and screaming lurid, abusive statements concerning an imaginary liaison between your mother and Captain Clippy-Clops the Donkey. It's hard. It's tough. It's nails. One of the criticisms levelled at the original game was that it was too easy to complete: it seems the development team have been careful to ensure that you're not going to get to the end of the sequel without ripping out all your hair (and teeth) with frustration. Indeed, sometimes, the sheer difficulty involved can seem overwhelming. Here's an example. Let's say you've just fallen into the moat that crops up fairly near the start of the game (and I promise you, you'll fall into the moat - at least twice). Once you've come to terms with your new surroundings, and said ooh, look, I'm swimming and that sort of thing, you'll be assailed by aquatic nasties (in the form of fish and tentacles). Now, you might not find a fish particularly threatening in real life, but believe you me, they're a force to be reckoned with in Ecstatica II. If there's more than one of them snapping at you, and you're backed into a corner, then it's curtains.
But it's not just the fish -although they were my particular Achilles' heel. Given the way that some monsters literally materialise out of thin air (Er, shouldn't that be thin water? - Ed.), it's possible to find yourself unexpectedly surrounded and outnumbered at more or less any time. Save your position regularly and it's not that much of a problem - but in the heat of the moment, when you've just solved one problem and are running around in the middle of solving another, it's all too easy to forget to make that all-important back-up... which leads to much soul-destroying backtracking. Save, save and save again. Just as we were going to press, a last-minute phone call from Andrew Spencer Studios (that's ass for short -now really, I ask you) revealed the team agreed that, yes, perhaps at times it can be a little too ruthless, and to this end they've decided to implement three different difficulty settings, with the creatures inflicting less damage accordingly. Assuming they're true to their word, this should alleviate the problem somewhat, meaning that slightly more ham-fisted players (or newbies) won't feel completely out of their depth. Ahhhh.
Hey! It's scored less than the first one did...
Ah, yes, it has (the original received 93% back in December '94), but that's simply because the world is a far crueller place these days. Don't be misled. Ecstatica II is bigger and better than the original. It beats the later Alone In The Dark games hands down. It's tough, insanely large and has several irritating flaws. But as I said before, it's never, ever boring. It's an immense, sprawling, beautifully animated piece of escapism which will grab you by the throat and attempt to entertain you to death. It may well succeed.
The Beastie Boys
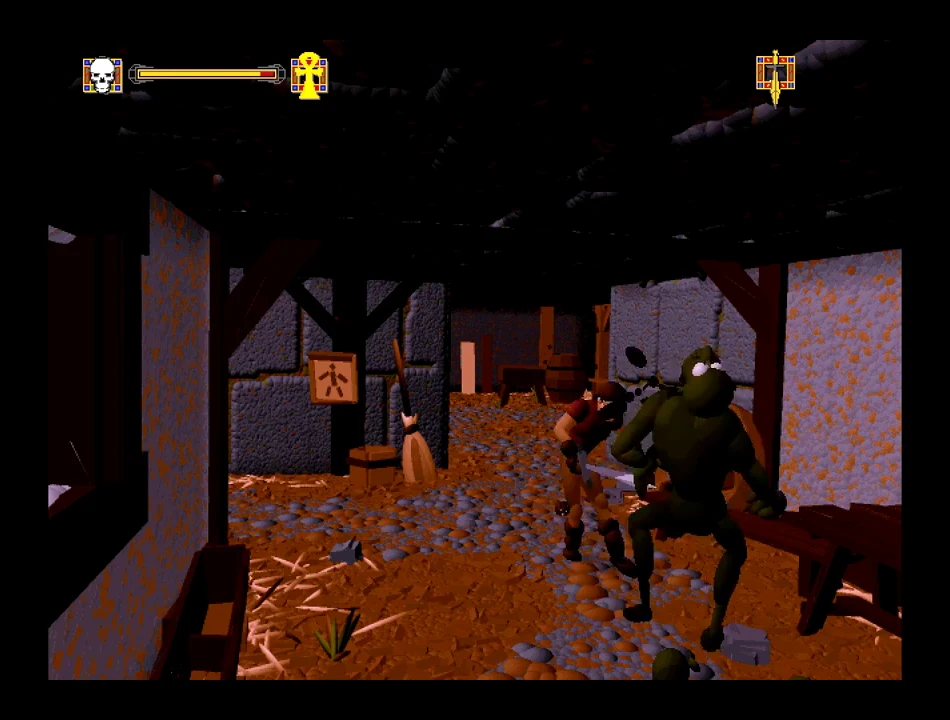
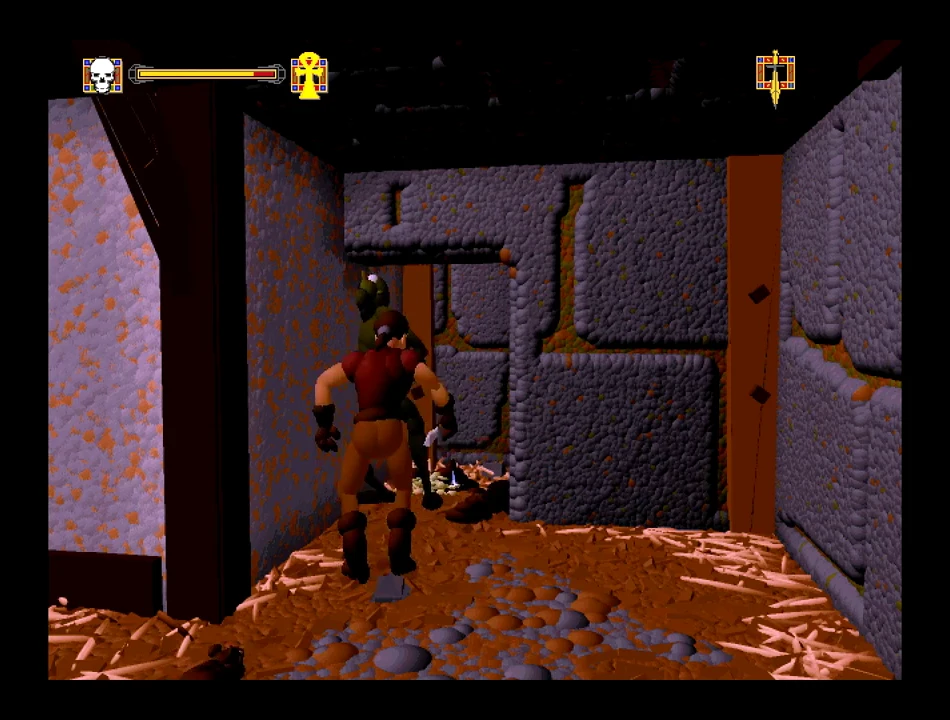
Ecstatica II plays host to about 50 different flavours of monster, each of whom behaves as if they've just caught you shagging their wife. In an Cunconventional' manner. During the wedding ceremony. And they just won't listen to reason. Consequently, there's little point in trying to explain that violence never solves anything, that you have no personal beef with them, that you don't even fancy their wife, etc... no, no, no. Your best bet is to do your best to beat the shit out of them before they do it to you. The nicest thing about the monstrosities you'll encounter - indeed, the only vaguely Cnice' thing about them - is that you're constantly surprised by the inventive nature of their ugliness and cartoon-grotesque animation. Unexpectedly running into a new monster elicits a peculiar response, somewhere between Cabject terror' and Cintense curiosity'. Andrew Spencer and the gang have scattered new creatures throughout... which means that even when you're nearing the very end, you're still going to be continually surprised by what you see.
Ring in the new
The differences 'twixt Ecstatica numero uno and Ecstatica numero two-o are manifold. Here's a handy cut-out 'n' keep guide for you to hold in the palm of your hand and look at with your eyes...
No Mode-Switching
The original game featured three different Cmodes' of travel - sneak, walk and run. A nifty idea, but in practice it turned out to be rather unnecessary, since the player tended to spend approximately 99% of the game running away from that bastard werewolf. Consequently, Csneaking' didn't get much of a look in. Well, that's all been done away with in Ecstatica II. It's run, run, run all the way. A little annoying when you're trying to gingerly clamber around the side of a formidably tall tower, but overall, it's an improvement.
Gender-Bending Is Out
Furthermore, the first Ecstatica allowed the player to choose the sex of the lead character. It didn't really change anything, since both male and female were equal in terms of strength, speed and buttock pertness - but it was a nice little feature nonetheless. Especially if you've ever fancied yourself as a bit of a Cbird'. Anyway, there isn't any such choice in Ecstatica II- it's testosterone time throughout.
CBut... There's Nothing There!'
A phrase that was uttered so frequently in Ecstatica I, it became a mantra. Nobody says it , this time around. Strangely, I kind of miss it. In its place is a weird kind of grunting sound -a bit like the sort of noise that really fat people make while asleep, so I'm told.
Beyond The Grave...
In Ecstatica the former, your death would be greeted by one of several animated cut-scenes, in which the ungodly pack of monsters would stand around laughing and beating your lifeless corpse into oblivion, like a class of south London teenagers dealing with an inexperienced supply teacher. There isn't quite so much gratuitous cruelty in Ecstatica II. Here, when you die, no one really rubs it in afterwards. They don't have to. Because the manner in which you die is usually bad enough.
More Monsters...
Yes - loads more monsters and they're easier to kill this time. But here's the important bit: there's an endless supply of them. You may have run riot through that particular segment of courtyard a mere five minutes ago, nonchalantly slaughtering everyone in sight, but that's no guarantee of safety. It'll be teeming with nasties again - sooner rather than later.
Download Ecstatica II
System requirements:
- PC compatible
- Operating systems: Windows 10/Windows 8/Windows 7/2000/Vista/WinXP
Game Reviews
Walkthrough
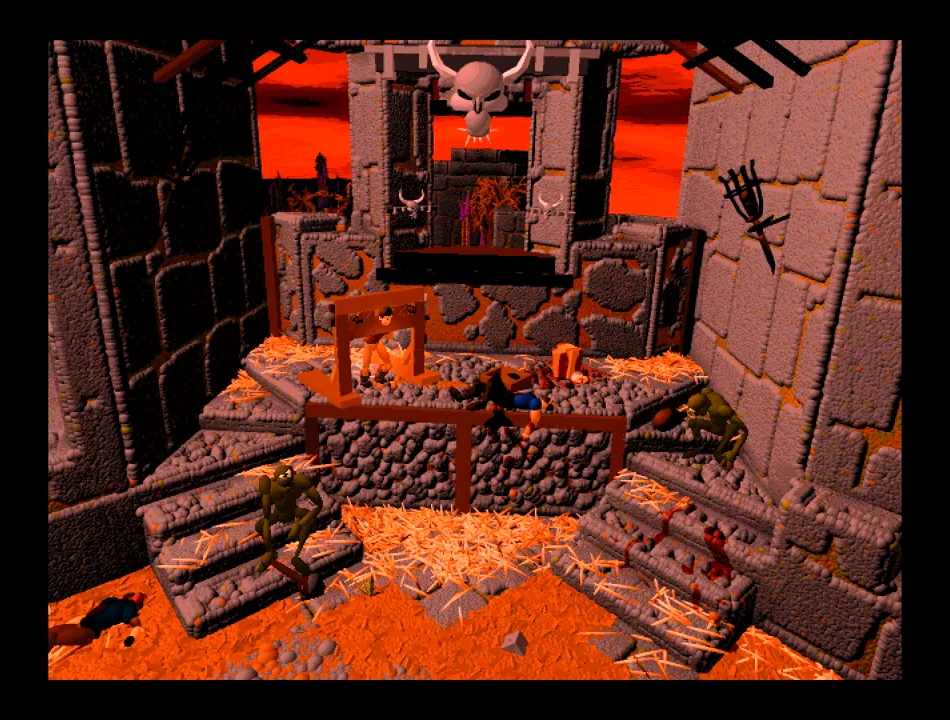
The Prison Tower
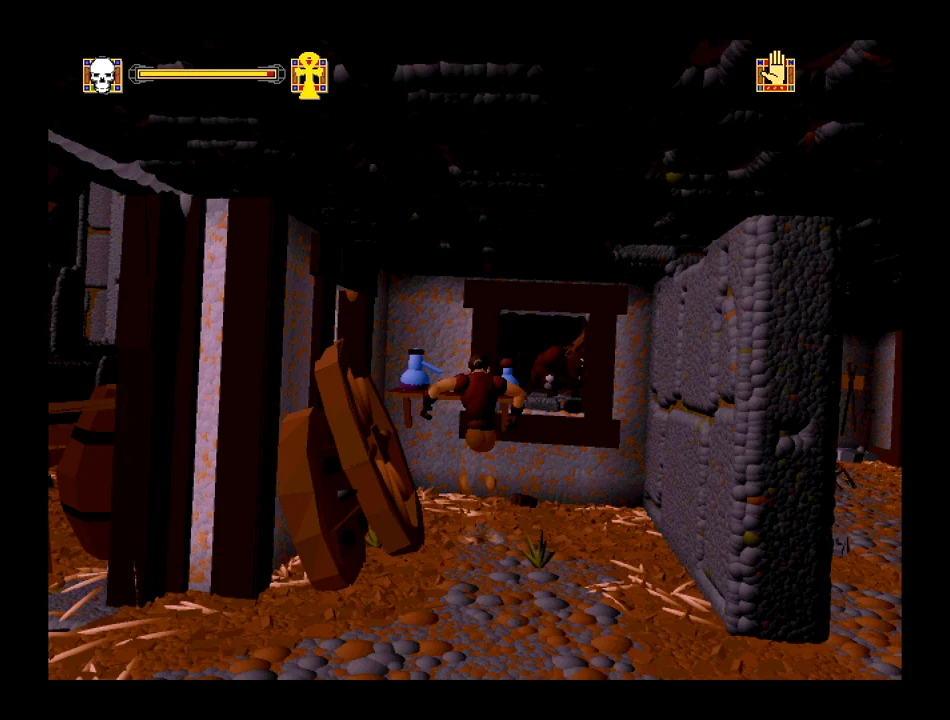
As everything is out to get you, your first priority is to find a weapon. From the stocks, turn left into the courtyard, go to the Craftsman's Guild and take the sword that is leaning against the blacksmith's tools. Now you are tooled up, trot along to the Guard's Tower and go straight up. You'll see treasure in a cage which you'll have to wait until later on to pick up. Near the top of the tower is a fatal spear trap. To trip it you must hit the head from the side. Now take the key and open the door. Take the stairs leading to the next tower, go past the inactive teleportation plate, and down the stairs to the bottom of the prison tower. Keep going, past the two gargoyles, until you get to a closed portcullis. Take the armour, which is floating, and make your way back to the prison tower. Take care, a gargoyle will attack you from behind. Now you can go up the stairs of the prison tower.
Go past the first locked door and up to the second. Smash it in and take the key from the chest. This will open the door below that will set the priestess free. At the very top of the tower is a staff to take the place of your weak sword. Now go to the very bottom of the tower and whack the two gargoyle heads. The portcullis should now open. Carrying on, if you go down the short flight of steps and turn left, you should see a gargoyle's head under the balcony. Hit it.
The Attic
Now go to the attic. You may have to go the long way round. Go through a door at the top left hand corner of the screen. It may be hard to see, but it is to the left of the closed portcullis. In the attic, find the blue switch (gargoyle head) and hit it. Near the spiral staircase, which leads out of the attic, there are three levers. Hit the blue one. This will activate a portcullis in the main corridor, through which you will find a blue key. Go back past the lever room and you will eventually find the blue door. Hit the green gargoyle head, go back and now throw the green lever. Another portcullis will open as you go past (near the blue door), inside which you will find the purple key. Now hit the gargoyle's head in the room with the purple door. It is now time to hit the red lever, and return to the blue-door room to hit the second gargoyle head.
Two portcullises will open in that room, and a silver sword and some treasure lie behind one of them. Hitting the head here will open the thatched hut outside. Next, leave the attic and go down to the main courtyard near the well.
The Main Hall
The double doors behind the well lead into the main hall. Give them a whack and walk in. There are bad guys around but if you search the ground floor you should find enough treasure and potions to keep you alive when you venture upstairs. When you go part way up either staircase, a shadow warrior will appear. Get up close and twat it. Go back down that staircase and up the other to kill the second warrior, on which he should drop the first fragment of the eldersign. Go up the staircase on the right, and at the top of the stairs walk straight on. Take the left doorway and run in to face the warlock. After you've killed him, retrace your steps and use the crystal ball. Go back down the stairs and exit the main hall.
The Monster in the Well
Next you must head for the stables. These are close to the guard tower on the right hand side of the courtyard. Go through the doorway on the left, where the horse is. Travel down the ladder, hit the gargoyle head and go through the portcullis. Turn right and go into the tunnels. You may have to search around but you'll eventually come across a drunken monster. Pick up the pink bottle (I picked up the wrong one first time) and leave the tunnel system via the way you came in, the stables. Go back to the well by the main hall and walk slowly towards the monster in the well. He'll snatch the bottle right out of your hand, but hang around a bit and he'll disappear in a puff of smoke. Next, head down into the well (take the ladder, it's safest) and hit all three switches. A large doorway will open. Go through, take the stuff you want and scamper back up the ladder into the main courtyard.
The Lost King's Tomb
Walk downwards from the well and take the door to the left of the horse. Go up the stairs and you'll find yourself on the second level of the craftsmen's guild. Locate the ladder leading upwards and climb it. Look around and not far away there should be a second ladder leading up to the roof. Climb up and take the stairs to the top of the chimney. Now fall into the chimney and you will be teleported. The stairs nearby lead up to the King's Tomb, but you will need to find three flashing skulls to place on the empty pedestals to gain entrance. The other two sets of stairs lead down into the catacombs where you will find the skulls. Remember you can only carry one skull at a time. While down there, look for the hidden gaps along the passageways. When you find one, leave the catacombs and up the stairs, walk up to one of the empty pedestals and the skull will appear on it. Once you have placed the second skull in the main part of the catacombs, go back down through the left entrance and take a left whenever possible, until you come across some downward stairs. Carry on through, walk slowly to the edge of the water until you see the flashing dots that form stepping stones, which will carry you to the other side. Go through the arch under the skull and turn right - you'll find the third and final flashing skull. Place it on the last pedestal and the main door will open. Go in and take the second piece of eldersign. Next, take the red amulet from the skeleton on the throne (to allow you through red-spot doors). Take the smaller of the two crosses, for access to the graveyard. Go back to the room you first teleported to, use the crystal ball and open the red door. This will lead you back to the well.
The Graveyard
Back in the main courtyard, run downwards from the well and get yourself over the acid pool blocking the entrance. Hit the gargoyle's head in that room, then leave and take the steps leading up to the left of the hospital tower. Past the red door is a meaty axe. Take that, then head back down. The main portcullis should now open, leading out to the drawbridge. Hit the level and go out of the castle grounds.
Go down one level, then left through some bushes. Straight on, you should find the graveyard. Follow the grounds round until you come across an underground entrance. Down there you'll find a room containing some spinning armour. Kill the chap that appears when you approach it and you'll automatically have it added to your inventory (press ENTER and CHECK). Go back into the graveyard and enter the church. Hit the candle at the end of the room and go down the stairs into an underground passage. This will take you into the middle of the forest.
The Sorcerer's Cave
Activate the crystal ball, then leave the screen and take the first right. Kill the plant and you should be able to take the next part of the eldersign. Go back to the main path and take one of the right hand paths. (Don't carry on through the rock path just yet; it leads down through to the village and certain death!) Take a right after killing a purple-red flower. The path you need is hidden. Follow it and kill the blue flower. Once past it, take the right hand path and follow it round to a blue flower guarding a blue gem. When you've got the gem, go back and you should find a hidden path through the rocks on your right. Go through and take a right on the first and second fork. Take the next left to find a clearing.
Kill all the Amazon people and head to the cave in the top left. Take the top exit, kill the Sorceress, get the ring, then go back out into the clearing and collect the next piece of the eldersign piece in the top right of the screen. Go back into the cave and activate the crystal ball, then teleport out. Now you can open the blue spotted doors and get a nifty sword from the treasure room at the top of the guard's tower.
The Wizard's Tower
Go to the right of the well and climb up the steps to the side of the guard's tower. Past the swinging axe you should find yourself on a ledge. Go to the door on the extreme left and into the room with the bombs. Run through and climb up the steps on the side of the tower. Watch out for the bombs on the stairs before you go through the blue door, and pass through the passage next to the blue door. Climb the steps until you reach the top of the tower, looking out for wallzombies. Don't worry about the protected amulet; you have to kill the wizard first. Now go through the door in the upper left and you will reach the top of the tower via the teleporter. Walk down and kill the wizard when he shows up, then take the armour that appears. This will allow you to defeat the black monks in the village. Take the teleporter to go back down and take the now freed amulet. Go down one flight of stairs and find the exit to the side of the tower on the right of the screen. Go through the blue door and get the next piece of the eldersign. Walk down to the second last level of the tower and go outside through the doorway with the skull. Use the crystal ball and take the teleporter back to the forest and make a right, via the rock path to the village.
The Cursed Village
Find the well in the centre of the village and locate the house with the open ledge. To get in you will need to break down the blue door near the small hut that has four entrances. Take a running jump into the well. Go through the door and the cursed amulet will be destroyed. Climb out of the well and onto the abandoned temple down from the well, where you must activate the crystal ball.
If you look carefully at the villagers, they will point you in the direction of the hunter's lodge. Find the room with the stuffed bear. Hit the bear's paw and go into the opposite building. Take the lantern from the fireplace. Now go back to the village and find the pond. Go past it and into the forest. Find the old ruin and go through the red teleporter. Follow the corridor through and you come out on the mountainside. Jump up to the doorway visible in the top left and go through to the blue teleporter.
The Necromancer's Domain
Take the trail up, and up again, past the inactive crystal ball. Ignore the gem in the Necromancer's room - first you must kill him. Get the sixth piece of the eldersign, then activate the crystal ball you passed by earlier. Next, enter the checkerboard teleporter to the dark tower.
The Dark Tower
Here, time is of the essence. The six mazes are all pretty simple once you get the hang of them, so save often and keep a track of the timer in your inventory.
In the first maze, the key is in the chest on the right side of the screen. In the second, try the chest on the lower left-hand side of the screen. The third maze has a couple of invisible teleporters but it's easy to get the hang of. In puzzle four, go right, through the doors and past the teleporter. In the bottom part, head left and open the treasure chest. Go for the bottom right and on to the chest in the upper right area. After you've done that, go to the central area, and from there move up to the upper left and on to the central teleporter. On level five open the middle chest at the bottom, then up to the top and take the key from the chest.
Remember on puzzle six to take the left-hand teleporter to the top. Then take the bottom teleporter to the left side, and walk to the right where a hidden teleporter will whisk you away. Now walk to the left, and you'll hit the second hidden teleporter. Move left and take the teleporter to the top of the screen. Now walk to the glowing balls and out.
Follow the hallway and you'll find the last piece of the eldersign in the left chest through the right door. Make your exit from the room and roll through the top door. Get past the hammers to the bottom, take the shoes and go back to the left hammer, where you should discover the scroll. Move quickly now and take the left hallway, then the top one. Follow this round to a right doorway, ignore the chest, move up and take the gold key. Then it's back to the forcefield, pass and prepare for the final battle with the Archmage. Good luck.
While the appeal of the first Ecstatica faded too quickly, Psygnosis's latest entry may find a home in the brutally crowded PC gaming market. With much improved graphics, an expanded map, increased character movements, and a larger variety of enemies, Ecstatica II has surpassed its predecessor in almost every way.
OUR HERO
Since the original adventure, Ecstatica M's hero has fallen on hard times--the Archmage left his castle in ruins and kidnapped his fair lady. With the Elder Sign destroyed and scattered throughout the castle, the player must rescue the damsel-in-distress and retrieve all the pieces of the talisman to restore peace. However, many monsters and puzzles stand between you and victory.
Upon starting the game, the most notable improvement over the original is the beautifully rendered ellipsoid graphics, which are sharp and highly detailed. Everything from the castle to the surrounding flora is rich with substance and color.
While the sound isn't up to par with the graphics, it's still very good, especially the voice-overs. Often, however, there's a lot of dead air between action sequences.
Only a Flesh Wound
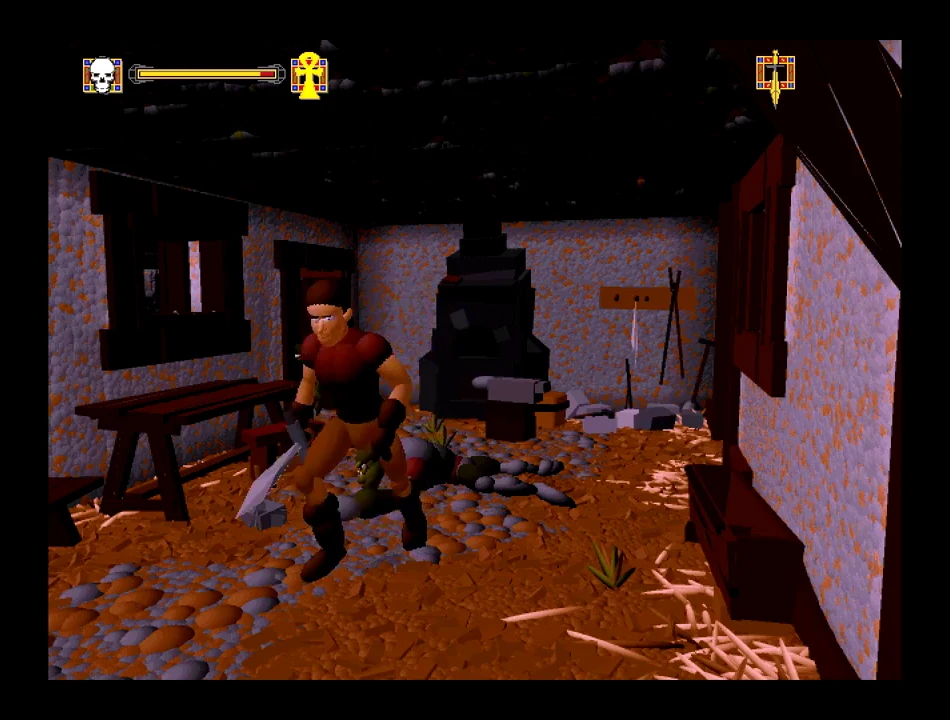
But the biggest disappointment is the control, which really hasn't improved from the original. Although our hero has added new moves to his repertoire, it takes lots of practice to master them. Key configurations for movements and attacks are too complex or don't respond fast enough. For example, while waiting for our hero to decapitate an ogre, other ogres gang up behind him and use his head for batting practice.
As for the gameplay, patience and nimble fingers are the overall keys to surviving Ecstatica M's engaging mix of monsterbashing and puzzle-solving. Still, a kamikaze approach won't see you through the game's strategic elements. Replenishing health doesn't come easily, and Ecstatica II boasts a diverse lineup of enemies that behave and attack differently even when their appearance is the same.
Noble Quest
Overall, Ecstatica 2's a great concept with amazing graphics and a solid story line. While the complex controls kill some of its appeal, Psygnosis has still fashioned a solid RPG/adventure.
ProTips:
- Preserve your health meter by isolating enemies one-on-one. Back yourself into a comer or line them up in a corridor.
- Make sure you obtain the green shoes so you can get past the green slime in the prison cell.
- Killing the Necromancer yields the sixth part of the Elder Sign and opens up access to the ruins in the forest and the final area, the Dark Tower (bring a lantern).
- In the ruins in the wilderness, exterminate a plant to get the third part of the Elder Sign.
- After clearing an area of enemies, always look for crystal balls, which give you hints throughout the game.
- When executed consistently, 360-degree low sweeps are an effective attack, especially when many enemies surround you.
- A key's hanging from the mouth of a gargoyle at the stocks near the top of the Guard Tower. Approach it from the side and kick it to get the key that unlocks the main balconies.
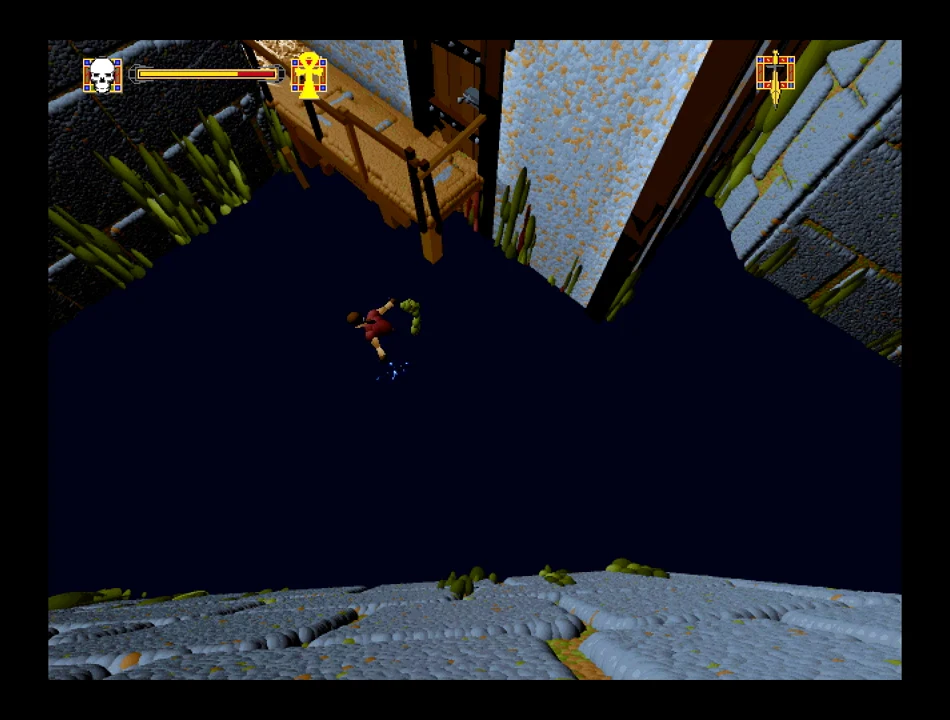
Snapshots and Media
PC Screenshots


 BioForge
 Call of Cthulhu: Dark Corners of the Earth
 Chronicles Of The Sword
 Normality
 Prisoner of Ice
 Rise Of The Dragon
 Shadow of The Comet
 The Orion Conspiracy
 The Pandora Directive
 The Coffin of Andy and Leyley
 The Price Of Flesh
 Evil Nun: The Broken Mask
 Changed
 Sad Satan
 Fears to Fathom - Ironbark Lookout
 Blood Trail
 Parasocial
 The House of The Dead: Scarlet Dawn
 Nun Massacre
 Resident Evil Code: Veronica
 Resident Evil 4 - Separate Ways