Unreal

| a game by | GT Interactive |
| Platform: | PC |
| Editor Rating: | 8.2/10, based on 3 reviews, 7 reviews are shown |
| User Rating: | 8.0/10 - 4 votes |
| Rate this game: | |
| Updated: | May 12, 2026 |
| See also: | Action Games, First Person Shooter Games, Shoot 'Em Up Games, Games Like Quake, Unreal Tournament Series |

Walk Into any arcade and you'll see row upon row of cabinets dutifully chugging away in attract mode - the show of enticing whiz-bang highlights the system defaults to whenever it gets hungry for coinage. It usually cheats a little - spooling video sequences with visuals infinitely more advanced than those available in-game, or showing staged set-pieces from exciting angles, which look way cool but would be impossible to play in. They try their damnedest to make the game appear slightly better than it is, and often they succeed.
It's hard to imagine an equivalent attract mode for Unreal. The whole thing is one massive, continuous enticement in itself. It's arguably the bestlooking PC game to date. It's also a damn good play. Now read on.
You're A Purdy Bwoy, Aintcha?
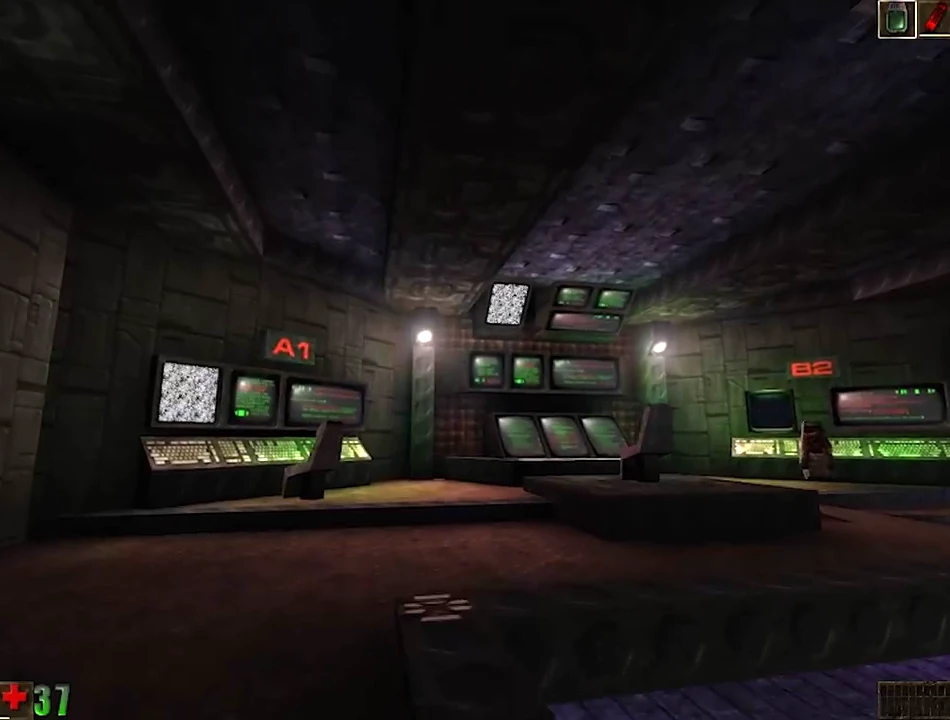
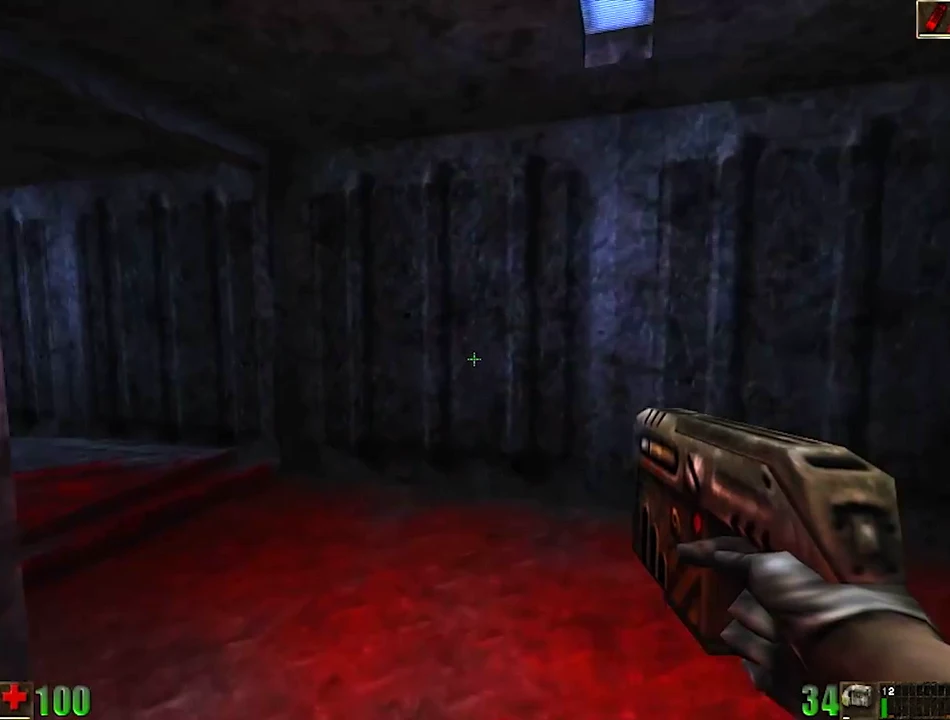
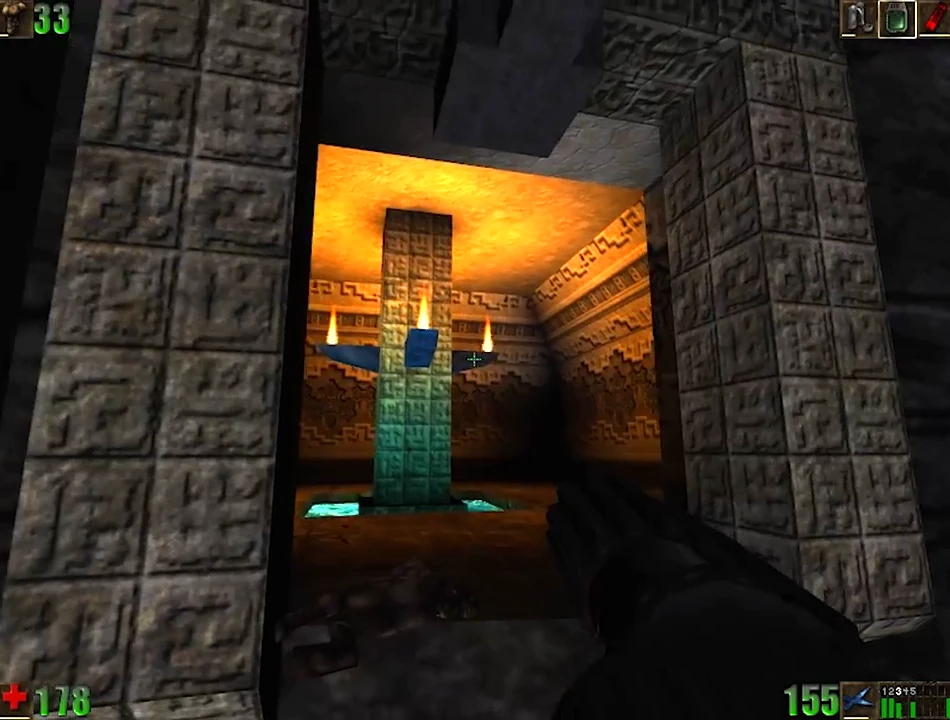
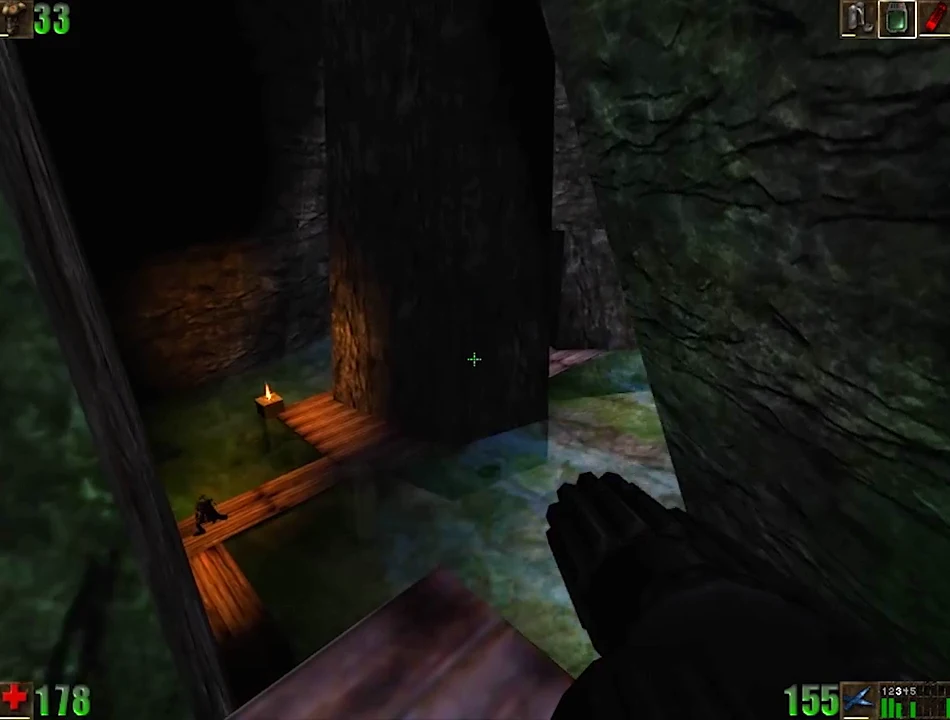
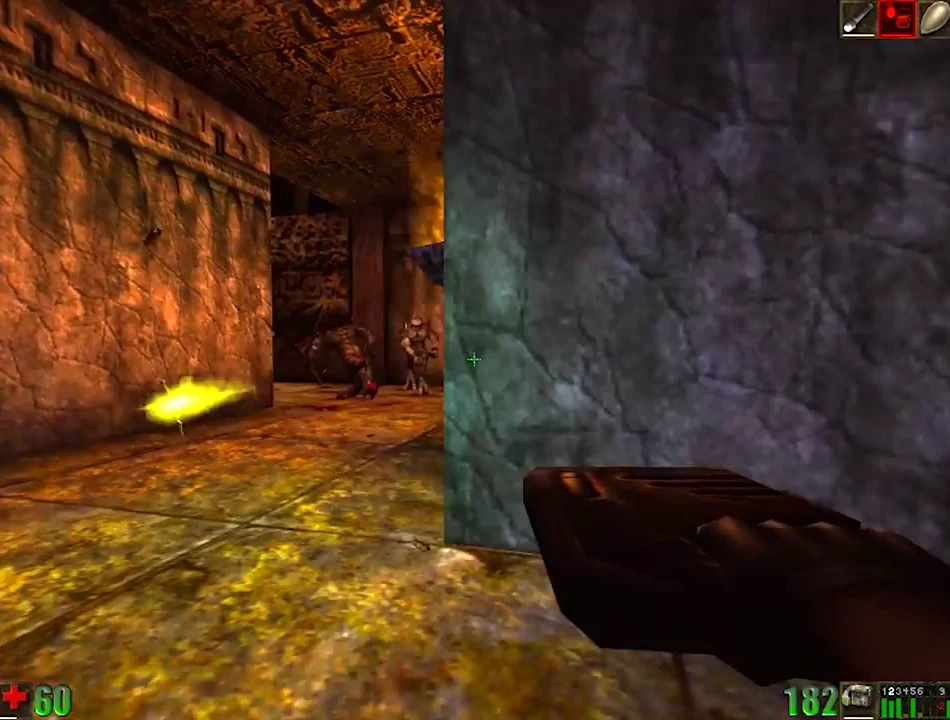
It's the graphics you notice first. The lighting effects are exceptional, with more stroboscopic, lens-flaring luminescence than you'd have ever thought possible. If Pink Floyd, Jean Michel Jarre and the Orb got together to host a concert, the accompanying lightshow wouldn't be a patch on Unreal. There are glowing lanterns, eyepiercing neon strips, dazzling explosions... It's just awesome. The volumetric fogging effect -which ensures that light is sometimes refracted as if through a shield of misty gauze - has to be seen to be believed. The reflective surfaces that really reflect will take your breath away.
Actually, there's probably a little too much poncy lighting on show here. After a few hours, your retinas start yearning for a vista of grey, featureless concrete to gawp at, if only to spare them the effort of straining to see past the dazzle. Live in Coventry? You're in luck. Keep the window open. Try not to hurl yourself out.
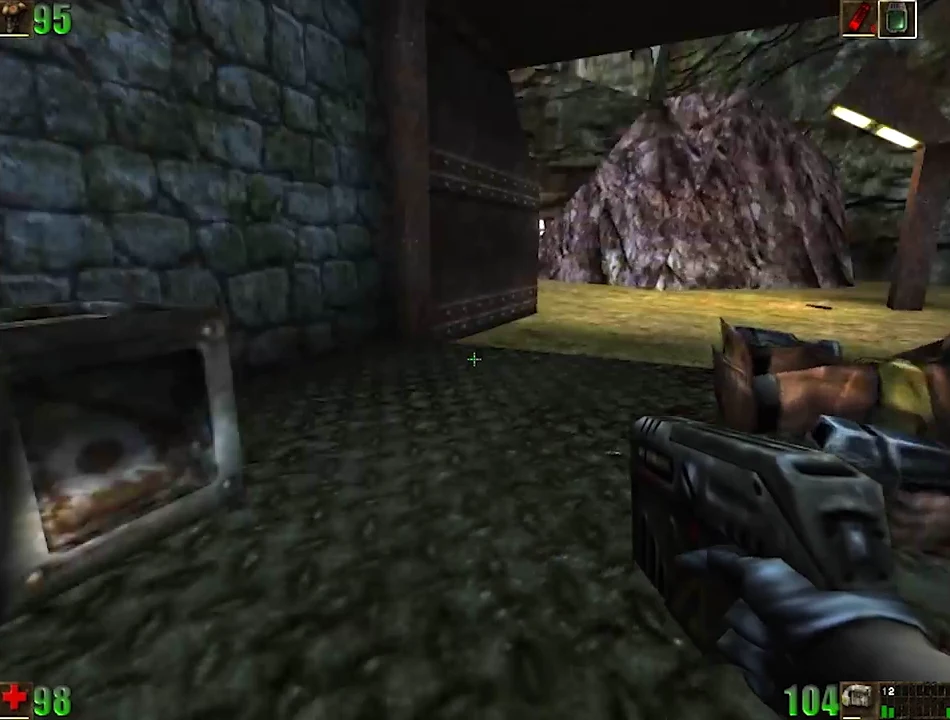
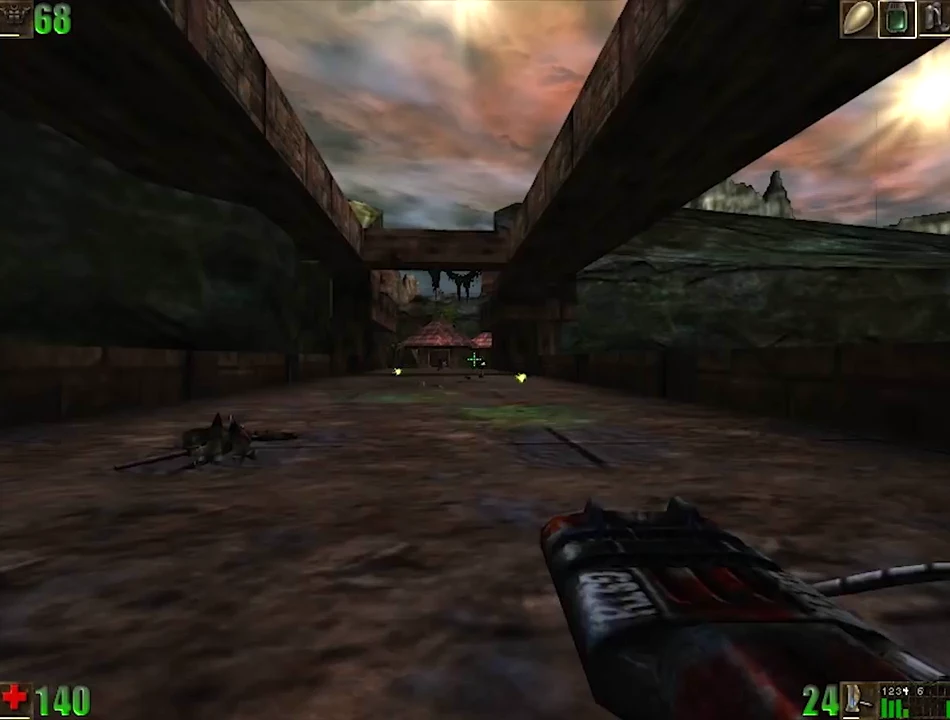
The textures, too, are brilliantly designed, complementing the expertly realised architecture. No complaints about 'sameyness' here, either. Unreal features plenty of architectural variety: from ominous industrial interiors to medieval stonework; from lush greenery to the snaking corridors of a futureworld starship. The sense of 'being there' is hugely impressive. The levels themselves can't be faulted. Not only are they impressive in scale - some areas are flabbergastingly immense -they also link together with fluid precision. Developers €pic have pulled off a coup: progression from one level to the next feels remarkably natural, as if you just wandered right in. Which brings us to our next point: atmosphere.
I Love A Party With A Happy Atmosphere
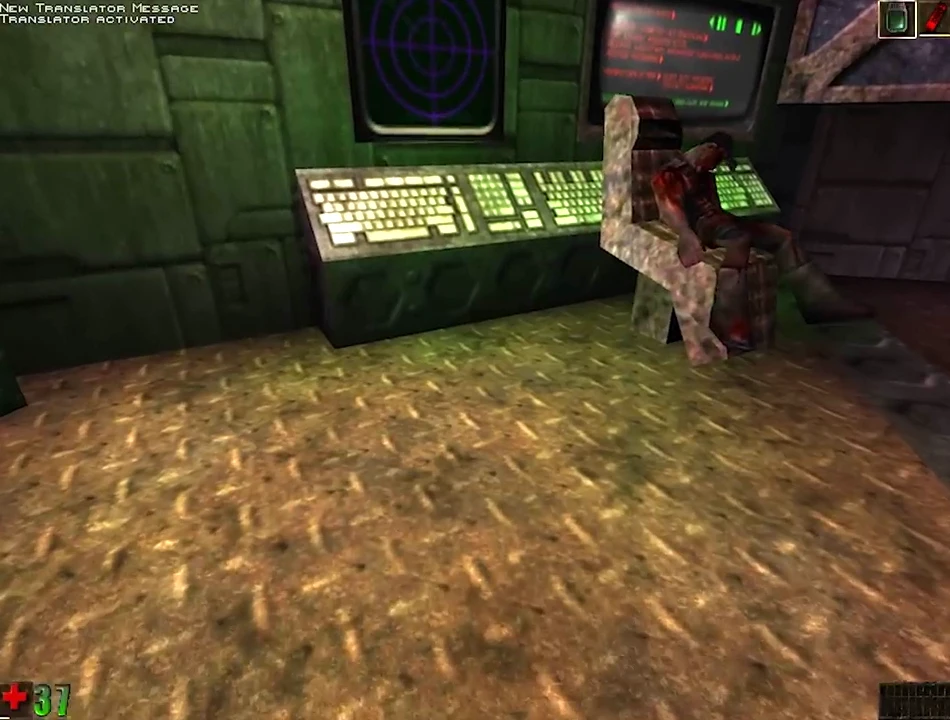
Atmosphere is where Unreal beats other contenders outright. The storyline unfolds as you play, and for once it feels like part of the action, rather than a cursory plotline tacked on for the sake of anally retentive sci-fi fans. At the start of the game, you come to a cell on a prison ship. The craft is in the process of crashing, and everybody on board seems to be dead. As you wander around the place, searching for weaponry and some kind of first aid, a trail of gruesome mutilated corpses gradually leads you towards the surface of the unknown planet below.
It's genuinely creepy, with one of the best opening gambits in recent memory. The magnificent sound effects help matters no end - provided you turn off the dire music, that is.
If They Move, Kill 'Em
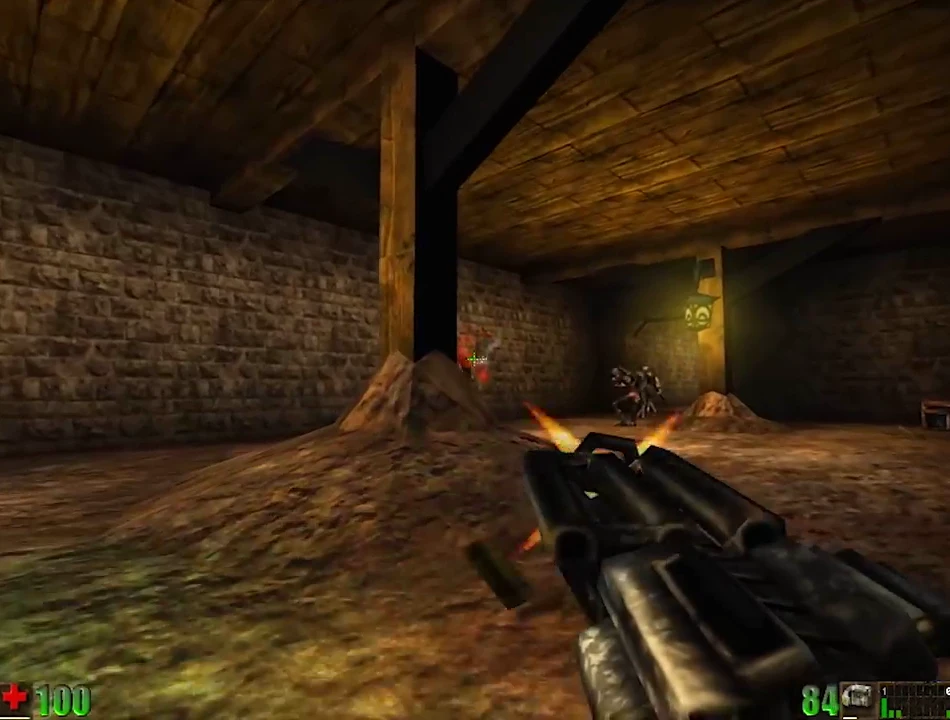
Now, then. The enemy. Unreal's monster squad is disappointing. None of them are truly unsettling in the way that, say, Doom's fleshgnawing demon was. Sure, you'll jump out of your seat on occasion, but that's because they've just leapt from a dark comer, not because they look particularly fearsome. Put simply, the Unreal menagerie just doesn't inspire terror. The creatures are sleek and well-animated, but they look more like people in rubber suits from a 1980s sci-fi epic than authentic alien butchers. Which brings us to problem two: they're also too similar. Most are vaguely humanoid in appearance, and the majority of the time they're bathed in coloured light, so in the heat of the moment it's often hard to tell one from another. A few stand out, but overall they're a bit lacklustre. Shame.
Nobody Likes A Smart Arse
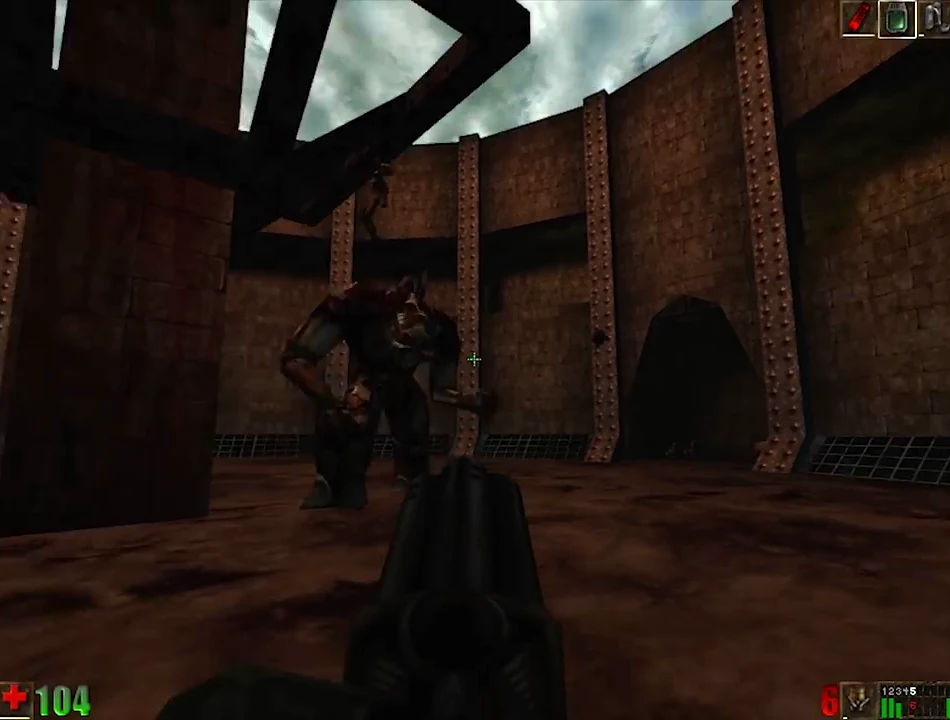
Still, at least they ain't stupid. Monsters roll away from your shots, duck for cover behind nearby objects, circle-strafe, and scurry away screaming like girts when their survival prospects look grim. Wiping one out can take an absolute age - assuming you live long enough. Not only are they damn good shots, they're also adept at sneaky stunts like momentarily playing dead. There's no messing around when it comes to tracking you down, either. They're not averse to taking the long route round an obstacle if it's likely to catch you off-guard. The oddest thing about this superior AI is how annoying it can be. For example, when you're running low on ammo (that is, during every second of the game), it's unbearably frustrating to watch your enemy tumble out of the firing line, especially since their reaction times can be cruelly unfair - they often respond within milliseconds of a round leaving your chamber. Still, it's intensely satisfying when you finally nail one, because you've usually developed a deep loathing of the creature concerned by then. In this respect, it's a bit like hunting estate agents. Which is something we implore you not to do in real life. Oh, and don't burgle their houses and crap on their carpets either. No, really. Don't. That would be illegal.
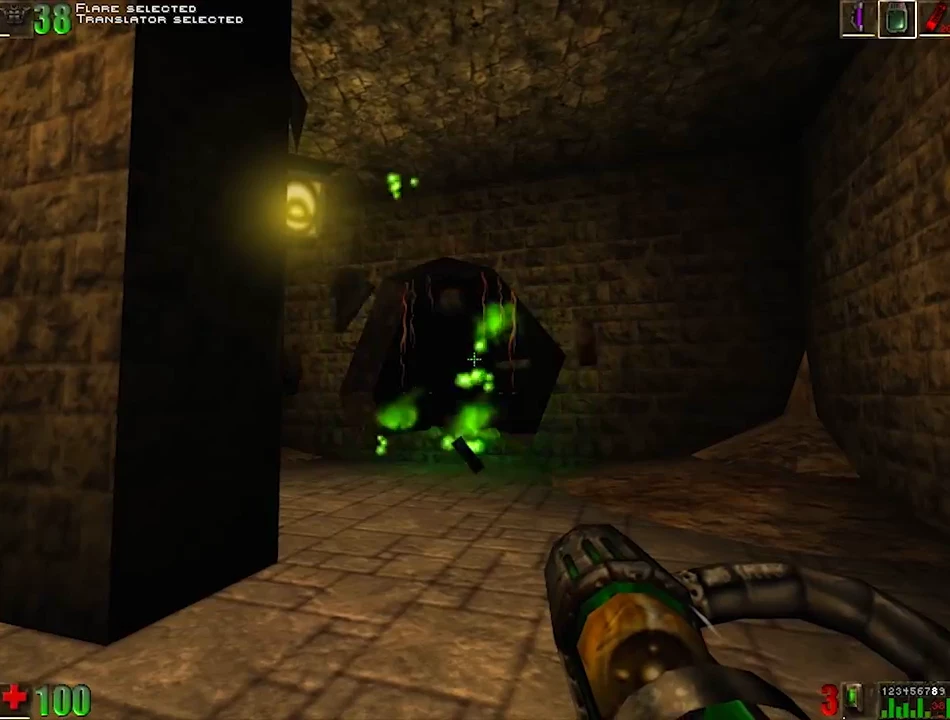
By the way, many of Unreal's weapons look and feel disappointingly effete. We defy you to enjoy using the Bio Rifle, for instance. Still, it's not all grumbles: the provision of two modes of use for every weapon livens things up considerably.
Okay, we'll say it again: no, it isn't better than Quake II. Deathmatch lets it down. In single-player, however, it's perhaps the slickest, most engrossing piece of entertainment you'll encounter this year. Unreal may not be stunningly original, but it is enthralling, exciting... and huge. Don't miss it.
WHO'S THE DADDY NOW?
Will Unreal knock Quake 2 off the deathfest throne?
Once we'd finished going "Qooh", "Ahh" and "Who spiked my tea?" In response to Unreal's lush visuals, we turned our attention to the multi-player mode. Could Unreal be the game to wrestle Quake II from its current Number One slot as the after-hours deathfest of choice? No. For the meantime at least, Q2 is still king. A quick poll in the office revealed why. The biggest stumbling block is the disappointing Unreal arsenal; everyone agreed there's nothing to rival the close-up ferocity of a Super Shotgun, or the intense satisfaction of a long-range Rallgun kill. Other points of concern included the way damage seems under-represented until it's too late, and the overall feel' of the thing ("You don't ever feel quite as in control as in Quake H," says art hotshot/Quake addict Tim).
Further options, such as spooky torches-in-the-night DarkMatch mode, are fine, but to topple the big Q2 a game needs to offer something show-stopplngly original and fiendishly addictive. Sadly, Unreal doesn't. Still, at least Epic will ship Unreal with all the Deathmatch levels intact from the start. Unlike ID, who let us all down with their scrappy patch-upon-patch routine earlier in the year. So there.
Download Unreal
System requirements:
- PC compatible
- Operating systems: Windows 10/Windows 8/Windows 7/2000/Vista/WinXP
Game Reviews
Picture The Scene, Will You: A programmer's Chut' somewhere cold in Canada where it is so huge and sparsely populated that there's over 600 square kilometres of territory per Canadian. Arch emperor high master ninja coder Tim Sweeney (for it is he) is hunched over a glowing monitor, upon which plays the latest incarnation of his famed Cengine - a glossy 3D swivelling rotating first-person perspective affair not un-iminediatelv reminiscent of a certain game beginning with but with all manner of bells, whistles, effects, dancing girls, casinos, and 24-hour garages fitted on.
Alongside Jim squats James Schmalz, the game's executive producer and oft programmer, who's been nurturing the game since the work started 18 months ago. Why, but the boys seem to be having a heated discussion about something. Let's turn the volume up...
...No, I say we call it CJuicy'. CJuicy'? CJuicy'? How can you call a first-person sci-fi shooter, CJuicy'?
I think it has a certain ring to it. Alright, what about... er... CRichter Scale'?
Nah, too Quake-y.
Okay then, CPillow Fight'.
What?
Joke. Er, CEmperor Executor 3D'? Too much like Duke Nukem.
What about CGirth'?
"Girth?
It's what matters. Hmmm, I prefer CBlades Of Arachnon'. Or CThe Thong Of Thorgandia'. Nah, we should call it CGirth 3D. By-line: CHave it where it matters.' But it has a female protagonist... Well, that can be swapped around. Youthful coffee-maker minion enters room, takes one look at the nextgeneration engine sashaying across the screen, and says: Woah, that engine, man, it's unreal. Et cetera et cetera.
The game
Unreal was for a while an Cengine without a game'. CMore like Unfinished' went the (hilarious) joke. But on first look, as engines go, this one is definitely what Clarkson would describe as Cso smooth I'm going to take the dashboard home and sleep with it'.
It is, of course, exceedingly Quake-like, but this is kind of inevitable. Quake is exceedingly life-like, so it follows that any 3D-style game will look like Quake. Setting-wise, however, Unreal has the same gloomy corridors leading to lugubrious caverns, treacherous walkways, lava pits, moats and limescale walls. Dark scary catacombs rub shoulders with over-lit arenas. Spiral staircases lead to rooftops. Rooftops lead to cliff faces. And cliff faces - should you lose your footing - lead to horribly spikey death pits. The action is all first-person, with your weapon bobbing familiarly in front of you, and a meaty toolbar of shield, ammo and health statistics below. Unreal's engine, however, is deemed to be Cnext generation'. That is, like the Star Trek crew - fresher, glossier and better lit (and without a fat, balding goblin called Shatner). The engine takes the rough elements of its predecessor and then soups them up with all manner of new features.
The first innovation pops up when you bump Helen Keller-like into a wall. The textures do not pixellate or turn into Hundreds 'n' Thousands on close inspection. In fact, they dither and smooth over, creating a very convincing filtered look. Then you realise you're actually playing under Windows 95 and the engine is using all manner of Direct3D and mmx optimisations to pull off a decent, nay excellent, frame rate. Even in hi-res. And 16-bit colour. Without a 3D accelerator card.
The lighting, too, is extraordinary. Lights can be coloured, single or two-tone, and then made to play across walls and floors in all sorts of cool ways. They flicker like torches, rotate like lighthouses, flash on and off, or simulate the undulating motions of bad day-afters or the shimmering of reflected water.
Overall, especially with architectural motifs such as spiral staircases and stained glass windows, everything looks a whole lot smoother and faster and more realistic than Quake. The test levels currently in place are designed to show off the various effects. As you watch the churning walls and bizarre shadow effects, you think of Dark Forces, of Quake, of Hexen, and of your last meal. Naturally, the talented boys at Epic are planning to get some Duke Nukem-style settings into play:
Yeah, in Nukem you had real-life places such as a theatre or space station, says James. We'll be moving to more specific textures to create recognisable areas. These locales will depict an ancient alien planet where you're stranded after your prison ship crash lands. You play the sole survivor of the downed vessel, a female prisoner convicted of crimes you didn't commit, who finds that the peaceful race inhabiting the planet has been overcome by a swarm of nasty, vicious domineering, and hostile aliens, ho have also crash landed -and they covet the only means of getting off the planet in the centre of a sprawling medieval/sci-fi complex of interconnecting tunnels, castles and decrepit industrial buildings.
You - our pointy-breasted heroine - have but your agility, combat skills, your sense of direction and a mighty array of big willy-shaped armaments to aid you in your quest to get off this damn rock.
Unreal = BTQSP
The game has been in development for around three years, guided by the pale hands of Jim Sweeney, chairman and head programmer at Epic, who - like his comparative code head John Carmack at iD Software - spends all his time, his life even, writing engines (He doesn't get out much, no...). In the pre-Quake wilderness that was 1994, the original Unreal concept was developing within a Magic Carpet-style environment, complete with Terra Nova-esque mountains and a full bestiary of medieval monsties. Then a few months down the line, the front end had been transformed into a first-person affair, which then underwent a further transmogrification when Quake materialised last year.
Of course. Quake's release had a major effect, says James. But, frankly, we'd been doing much of the same stuff in Quake six months earlier. Only when Quake came out, we decided to add features which it lacked, such as dynamic coloured lighting and advanced artificial intelligence.
Right now, the whole game is a few months from release, with a team of 16 ferreting away in the background. That's one lead programmer, three other coders, four artists, one animator, five level designers, one musician and one producer. Aside from the glorious engine, Unreal is likely to sport a few other btqsp (Better Than Quake Selling Points).
The monster ai is likely to consist of 15 to 20 adversaries, from gory slug-like things to well-armed ogre-type whatsits. Some will fly but all will have highly advanced artificial intelligence. Steve Polge, who programmed the highly popular, highly deadly ReaperBots for the mighty Quake, has been hired to do the ai for Unreal. Apparently: We've had to make them far less intelligent. They keep beating our testers.
Level Editor
Unreal will come bundled with an unbelievably impressive Level Editor. It uses the Windows 95 interface and a bunch of simple icons to make 3D level design nigh-on effortless. All the levels are constructed from Cbrushes' - solid chunks of matter (walls, floors, stairs etc) and Cpawns' - game objects like monsties and weapons - which can be dragged and dropped within the Editor to make virtually any kind of milieu. It also features a real-time 3D preview and works alongside the game, allowing you to pop in and out to check your Clevs'. Until Unreal is finished, we shall reserve judgement. Next month well talk to King Coder Tim Sweeney and will be reporting what one must do to become a King Coder, what one must eat and what one must like. Anon.
New!
Weapons
Epic intend to make Unreal's weapons relative to Quake as Duke Nukem's were to Doom's, ie better and more imaginative. Some very amusing and destructive pieces of hardware are on the drawing board, which we'll keep secret for now. Apparently they'll all use proper physics to allow ricocheting bullets and all manner of bloodied bouncing body parts. Yeah, there's going to be loads of gore.
Locale
Unreal will have 30 or so Clevels' which will join up seamlessly to build one big area. Basically this means there'll be no next-level transitions. It also means that you'll be able to explore outsidey bits. Yeah, you'll see structures outside, in the distance, which you can walk up to. Like a castle. You gotta approach it and find your way in. The brushes used in construction will also allow cool effects such as rotating rooms or entire levels which turn and translate.
Complete Walkthrough Part 1
We show you how to get through this cracking game
Chizra-Nali Water God Temple
Area 6
Object: to get the eight-ball gun and find the Inner Ceremonial Chamber.
Shoot the chains on the tethered raft and climb aboard. Jump up to hit the switch. Drop down into the temple, jump into the water and collect the Stinger. Swim up the passage to a Secret Area. Swim back to the main area, and climb the two sloping joists to get out. On the landing, a Nali gestures for you to follow. He will lead you to another Secret Area. Go back to the landing and summon the lift. Go up, then jump across the pool fortheASMD.
Turn around and head for the alcove to the side of the lift. Push the button and you'll be dropped down into a lower chamber. Now look for an extra button beneath the engravings; push it to open the door ahead of you. Enter the passage to your right, jumping over the blocks. Follow the Nali to the bridge. Jump down and walk along the beam to the oblong statue. Push it to move the bars from the door on the other side of the chamber. Walk up the passage.
Jump onto the platform and follow the Nali. You'll be lead to a button which lowers one of the columns on the opposite wall. Ride the column up and follow the route back to the antechamber. Push the button to drop down again and move along to the main temple entrance. Enter the temple and walk straight down the hole. Swim through the passageways and collect the Assault Vest. Return to the pool you jumped into and go up the stairs. Go into the small chamber and push the face to lower a lift on your right.
Ride the lift and pick up the ASMD cores. Follow the path back to the room above the temple entrance. Go back inside the temple, but jump over the hole. Cross the bridge to your right, and push the wooden pole at the end. Cross the opposite bridge and do the same at the other end. In the middle of the second bridge there are two stone pads; press the lower one and the doors behind will swing open.
Enter the chamber and jump onto the block to get the Super Health. Now go into the hall on your left. Follow it round and climb the loose stones. Walk down the ramp and turn right on the walkway. Ahead you'll find a large chamber with two Lightning Fire Rocks atop two pillars.
Push the button on the face of each pillar and go back the way you came. Approach the gold door, and hit the button to open it. Now follow the route back and open the other gold door. Go down and enter either passage. Climb the stones, jumping across the passage and then back to the platform, and make your way down to the Pool of Thunder.
At the back of the chamber, enter the waterfall to collect a Super Health. Walk down into the water and pick up the scuba gear. Make your way back to the pool with the eight-ball gun, and lean on the lever in the open alcove. Get the gun and jump forward to open the golden door. Walk
Ceremony
Area 7
Object: to defeat the Skaarj and find the way out.
Enter the first door and head left. Dive into the pool and swim up to the Secret Area. Swim down and push the lever. Climb out of the pool and take either corridor. Again, dive into the pool and push the lever. At the surface, head for the gold door. Walk up the ramp in the main room. Kill the Skaarj and the door will open.
Go up the ramp, kill the Skaarj and tug the lever. Ride the lift down. Follow the walkway for a while, then swim round the rocks to the grappling hook. Pull the lever and walk up the cable to the narrow ledge. Jump down onto the sloping beam and join the Nali on the other side. Follow him down to the raft and head downstream. Push the carving at the end.
Darkarena
Area 8
Object: to destroy the Titan and escape.
Head down the corridor. Push the stone face on the wall behind the barrel to open the doors. Walk down the stairs. Go outside and walk around the castle to the main door.
Enter the castle and take the stairs. Enter either alcove at the top and walk along the semicircular hallway. When all the Skaarj are dead, a door will open leading to three levers. Push all of them to open the inner doorways. Make your way back to outside the castle.
Flashlight in hand, enter the opening in the rock face near the crucified Nali. Shoot the crumbling wall and follow the steep passage. When it opens out, follow the hallway round to your left. Enter the door ahead of you and grab the ASMD. Flick the two switches to open up the cells. Enter either of the two main doors and take the ramp behind them. Throw the switch, and leap down. Walk up the stairs. The Titan is here, inside one of the alcoves.
Don't worry if you find yourself jumping all over the place; only the stones will hurt you. Use the central pillar for cover and take him out with the eight-ball and ASMD. Once the Titan croaks, enter the alcove and go through the hole in the back wall. Push the button to open the doors and exit the arena.
Harobed Village
Area 9
Object: to get the flak cannon and enter the stricken spaceship.
Enter the village in the clearing. In the huts behind and to the left of the well you'll find replacem ent eight-balls and med-kits. Make your way to the abbey at the top of the hill. Go behind to the cemetery and look for a button to open the furthest grave.
Go down the secret passage into the cavern. Cross the walkway and swim down the channel. Look up, and use your eight-ball gun to drop the Super Health. Go back to and enter the abbey. The Nali priest inside will lead you to a Secret Area that leads up to the balcony.
Follow it round to the lift, and rise to the bell tower. Grab the flak cannon and related goodies, then leave the abbey and head down the hill to the ship. Jump across what remains of the walkway, walk round to the right, and enter the door.
Terraniux Underground
Area 10
Object: to activate the lift totheTerraniux.
Follow the route round, then push the button on the far wall to bring the lift down. A mercenary is on it; use your flak cannon to drop him. Enter the ship through the door at the back and walk to the next area. Push both buttons.
Now go back and step onto the lift. Open the doors ahead and snipe at the mercenary operating the controls beneath you. Cross the walkway and take a long jump onto the platform. Take the Toxin Suit, and enter the brightly lit corridor furthest from you. Press the button to start the pumping station.
Terraniux
Area 11
Object: to exit to Noork's Elbow.
Drop into the now empty biowaste tank and walk through to the other side. Open the watertight aperture and head round to the left. Enter the opening and step onto the platform. In the room above, go across and push the button under the upper deck.
Go carefully across the remains of the walkway and get the Energy Amplifier from the alcove. Go back to the hallway and turn right. Enter the adjacent bio-waste room and again make for the button under the upper level. Get the Jump Boots from the alcove, and enter the door. Ride the lift until it stops halfway. Use your flashlight and leap onto the broken pipe. Tread carefully along it and look down at the end into the Secret Area. Jump into the bio-waste and swim up to the main area.
Go back to bio-waste room B and exit via the door in the alcove. You'll pass a non-functioning lift behind a pillar. Carry on through the door ahead and push the button below the upper deck. Go back to the lift, which should now work.
Ride it up to the hydroponic greenhouses. Take a left and make for the first corridor you come to. Push a button to activate the lift and travel up a level. Press any button to lower the lifts and drop down.
Get the ammunition and step on the platform with the button. Don't step off, but ride it for two levels. At the top, you'll find a Secret Area behind the Kevlar Suit which leads out to an area above greenhouse B.
Jump down and find greenhouse C - use your Universal Translator at the various consoles to pinpoint your location. Enter the door on the right wall, and dive into the biowaste. Swim along the pipe to the control room.
Get the GES BioRifle over by the force field, and push both buttons. Go out of the main door and head for the nearest pool of bio-waste. Swim around until you resurface just outside the Noork entrance - this may take some searching for.
Go inside the Noork and kill the waiting mercenary. Take the lift down.
Noork's Elbow
Area 12
Object: to explore the small village and then the temple.
Open the door and shoot at the canisters on the landing. Walk up the stairs and go down the ramp. Now head down the hill towards the imposing monastery.
Turn left, jump into the water, and swim round the side of the building. Go through the small cleft in the wall into a Secret Area. Get out of the water and climb the ramp to the monastery. Enter either hallway.
Temple Of Vandora
Area 13
Object: to light the Torch of Thunder and exit the temple.
Head up the stairs. Once you've defeated the Skaarj and Manta, retrace your steps and look for a new opening. Walk up the stairs to the Secret Area and collect the goodies. Jump down and walk across the courtyard to the door on the opposite side.
Walk down towards the pool and follow the Nali when he beckons you. He'll lead you to another Secret Area. Return to the pool, dive in and swim along the passage underneath. Keep to the right side to find another Secret Area. Swim back up to the surface. Leave the water, turn left and enter the Sanctuary.
Walk past the area the Nali showed you, go down the stairs, and enter the next area. Turn left at its exit and go down the stairs ahead of you. Go up the stairs on your right, get the Razor Blades and jump down to the landing beneath. Take the boat and at the landing collect more eight-balls and Razor Blades.
Push the button at the back of the room, then cross the bridge. Step on the switch to light the torch. Go back across the bridge and walk up the left ramp. Open all the doors, kill your assailants and grab all you can. Now take the boat back.
You should find a door above you to your left is open; enter the passage, turn left and drop down. Walk up the stairs on your right. Climb the stairs at the end of the hallway and cross the bridge. More stairs lead to a chamber. Take the right-hand passage and throw a flare into the fountain. Grab the Invisibility from behind the door that opens. Return to the room below and walk up the stairs.
Follow the walkway into the courtyard; turn right into the hallway. Follow it and walk up the hill. Go round the corner and head towards the entrance. In the courtyard behind is aTitan, so make sure you're tooled up. Once the monster dies, a door will open. Walk through.
Trench
Area 14
Object: to find your way to thelSV-Kran.
Walk around the corner and down into the trench. Take on the Titan, walk on and into the pool of red light - this will lower the lift platform. Climb aboard and enter the ship. Activate the lift by pressing the control panel; it'll take a little practice. Open the doors at the end of the landing and step forward.
Isv-Kran Deck 4
Area 15
Object: to progress up through the decks.
Walk through and press the control panel. Turn around and use the lift. Go up and veer right. Kill all the Skaarjs and the pit in the main corridor will open.
Jump down to the back of the pit and follow the shaft round, picking up the Razorjack on the way. Around a corner you should see a small panel on the wall and a large chamber ahead of it. Drop the long way down onto the central walkway, and press the control panel. Use the ventilation ducts to take you back to the start.
Go back up the lift and go right again. Follow the corridor to the end; this time the door into the warehouse will be open. Enter and turn left. Press the button and return to the centre of the warehouse. A loading ramp is extended. Climb it, press the button and return to the lower level. Go to the corner and walk through the door.
Complete Walkthrough Part 2
Area 16
Isv-Kran Decks 3 And 2
Object: to progress up through the decks.
Push the switch to open the elevator. Open the next door and push the switch on the support. Go up one level, open the door and follow the walkway. Open the bay door by pushing the switch. Jump down, enter the new area and take the lift.
Wipe out the Skaarj and walk up each ramp. Hit all the buttons and return to the floor below. Activate the control panel, go back upstairs and push the button to open the next set of doors. Enter the cooling system control room and go to the righthand room.
Start the pump by pressing the panel. Cross to the room opposite and start the draining process. Leave the room, take the door on your right and walk along the corridor. Enter the containment field generator room. Go through the door and drop down one level. Walk along the ledge and locate the gold power cores. Push each control panel to disable the force field and blast them. Drop through the hole, then down again. Jump into the lift in the comer. Go down again and crawl under the power arc. Summon the lift and enter the engine power core control room. Take the lift up and push the two panels.
Leave and locate the primary turbo lift off the main corridor. Climb on.
Area 17
Isv-Kran Deck 1
Object: get off the ship.
Run into transformer room one and hit the button. Find rooms two and three and do the same. Go to the research lab area. Go right and walk up the nearby ramps. The bridge ahead is inaccessible; turn round, blast the crates and go up the ramp. Hit the panel to open the doors. Jump down and enter the lab.
Hit all the panels: left, then centre, then right. Run up the ramp, hit the switch, leave the lab and enter the crew berth area. Jump down, open the lattice and take the lift. Make your way back to the crew berth area, and take the door at the end.
Ride the left-hand lift, then take another lift up to the observation lounge. Enter the water and hit the floor switch. Enter the grating and touch the panel. Swim back and find the bridge. Ride up to it, push either button and jump into the revealed chamber. Step into the transporter.
Area 18
Spire Village
Object: enter the Sunspire.
Enter the circle of huts and kill the Titan. Go up the hill, and look out for two more Titans. Walk up to the Sunspire walls and jump up to push the lock. The gates will open.
Area 19
The Sunspire
Object: take the skylift up to the next level.
Follow the path round to the right. Enter the Sunspire and take the right-hand corridor. Take the flashlight from the vase and enter the lift marked 'Sleeping Quarters'. Take the goodies, go back and take the next lift. Enter the kitchens and use the lift at the end.
Follow the path to the Great Hall. Push the switch under the balcony to get the mini-gun. Take two lifts to go up two floors. Follow the corridor and enter the Chamber of Crystals. Light the crystal, exit the room and turn right. Go up the stairs and enter the skylift.
Area 20
Gatewayto Na Pali
Object: locate the entrance to Na Pali Heaven.
Leave the skylift and kill the Krall. Go back and open the door; follow the tunnel round. Dive into the water and swim under the waterfall. Push the lever and swim back into the next chamber. Ride the lift and follow the path round.
Keep your flak cannon handy -it'll drop a Krall with two shots. Enter the tunnel, continue along and cross the bridge. Kill both guards. Veer right and go through the doors. Walk upstairs and enter the next door.
Area 21
Na Pali Heaven
Object: locate the entrance to the Skaarj Mountain Base.
Go up the stairs and enter the right-hand door. Push the lever to open the back door. Turn the wheel to open the sliding door, and walk across the outside area. Go inside and climb the stairs. Locate the lever to open the double doors.
Go back outside and climb the stairs. Enter the doors and follow the route round to the landing over the stables. Pull the lever to drop the wooden pallet. Drop through the hole and grab the assault rifle. Kill the Skaarj to leave the room, and shoot the crack in the wall. Go across the room and climb the stairs. Open the door and pull the lever to open the gates. Go back outside, through the gates, and head left at the statue. Walk past the pub entrance and along to the pool.
Enter the water and swim around to the crack in the wall. Blast open the crack and enter the wine cellar. Exit through the opposite door. Go up the sloping corridors and into the main pub area. Hit the switch behind the bar and go upstairs. Search the bedrooms for a lever.
Go back outside the pub and walk round to the courtyard. On the opposite side a door will be open. Enter, and pull on the lever to slide back the barn door. Enter the barn area and summon the lift with the panel. Touch the console to open the mountain base underwater entrance. Go back outside and dive into the large pool of water at the front of the building. Swim through the entrance under the waterfall.
Area 22
Mountain Fortress
Object: find the secret teleport room.
Swim to the end and open the door. Take the lift, go through the doors and touch the panel. Jump back down and open the doors. Push the panel, then push the other panel to summon the lift. Open the hangar doors by pushing the panel, and enter. Lower the lift and go up to the hangar control Touch the middle panel to lower the force field, and the left one to open the hangar doors. Return to the hangar and follow the corridor to the end doors. Enter the room and touch the panel to deactivate the field. Follow the corridor outside and enter the church.
Open the right-hand door and go up the stairs. Touch the console, go back to the main aisle and cross to the other door. Push the control panel to gain access to the catacombs. Walk around to the back door and hit the control panel. Now push the small control panel and jump down to enter the teleport room.
Area 23
Sleeping Giant
Object: enter Bluff Eversmoking.
Locate the sleeping Titan; he won't wake up until you snatch the dispersion power-up. He's real tough, so keep plugging. Once dead, jump onto his chair to open the doorway to Bluff Eversmoking. Wait for the bridge to rise and then follow the route round.
Area 24
Bluff Eversmoking
Object: activate the static discharge nodes and enter the Dasa Mountain Pass.
Pull the lever. Follow the Nali priest, and be sure to protect him. Approach the monastery and enter through the left archway. Find the graveyard and push the first tomb. Push the revealed button and jump into the tomb behind.
Get all the goodies and swim through to the well. Walk out to the wooden landing, jump down to the ledge and walk right. Follow the passage and take the stairs down. Don't go on the ramps; follow the passage to the prison and push the lever to open the cell doors. Dive into the pool behind the stairs and swim through to a Secret Area.
Collect the goodies and swim through to the small courtyard. Walk through the door to reach the area behind the main gate. Take the stairs down. Jump across behind the laser field and touch the panel. Push the lever to go back up and return to the stairwell. This time, climb the stairs and jump into the Sanctuary.
Collect the goodies in front of the mirror. Exit and go out of the main gate. Jump off the cliff into the water below. Climb out and onto the landing. Enter the tunnel and swim further to the next jetty. Keep going and step onto the round lift. At the bottom, follow the route round to the spiral staircase. Go up and touch the control panel on the left. Enter the square tunnel at the end of the room to reach the bell tower.
Enter the door and activate the lift. Pull the switches at the top. Push the lever to ride back down again; jump off the lift on the level before ground. Step into the cable car.
Area 25
Dasa Mountain Pass
Object: enter the cellars at Dasa Mountain Pass.
Open the doors. Keep close to the left wall to reach a Secret Area. Exit and go to the end of the hallway. Push the lever to open the doors. Go around the corner and lower the drawbridge.
Cross and walk down the sloping beam. Jump onto the ledge, walk round into the cave and dive underwater next to the wooden post. Follow the underwater passage to its end. Push the lever to call the lift. Ride it up and pull the next lever to open the main gates.
Jump down and dash through the open gates, locate the next lever and go through the door. Go across the water and up to the stairs on the opposite side. Follow the route round to enter the cellars.
Area 26
Cellars At Dasa Pass
Object: find the entrance to Mali Castle.
Enter the open hallway, climb the beams and pull the lever.
Go back to the entrance room and enter the other corridor. Go towards the alcove and take the lift up. Turn the capstan to open the main doors. Jump down and run through. Turn left and follow the hallways round. Go up the stairs, enter the side chamber and push the lever. Enter the inner castle; note the open room on your right, but don't enter it yet.
Go to the top of the stairs ahead of you and enter the large chamber. Push the loose block in the centre pillar to open a Secret Area. Follow it to a room above the chamber where the Titan and Krall are fighting. Toss the odd grenade below to piss off the Titan, and get him to bounce you up into the Secret Area at the top of the central pillar.
Now jump down onto the ledge above the barred exit. Push the button and leave the chamber. Downstairs, a new way is open and a Skaarj will attack. Push the lever behind him and enter either doorway on your right.
Climb the stairs, hit the lever and ride the lift at the opposite end. Push the button at the end before claiming the Super Health. Under the water is another Secret Area. Pull the lever on the bottom to open the doors and leave. Go back downstairs and enter the open room you saw when you first arrived. Follow it round and take the winding stairs down.
At the bottom, enter the alcove - the bar will slide back automatically - and ride the lift up. Walk along and hit the lever. Go back to the main room and exit. Go up, across the room, down the slope and into the water. Find the underwater shaft that's missing its grate and dive down. Follow the long tunnel to a chamber.
Push the lever and swim back. Go back to the central area of the castle, and head through the wrought iron gates which are now open. Head right and walk downstairs. Turn the wheel in the room to lower the twin lifts. Ride either one upstairs and double back at the top.
Enter the room with the Krall and kill them all for the gate to open. Exit and push the lever in the next room. Ride the lift and push the opposite lever. Now go back and exit through the panel behind the lift.
Area 27
Nali Castle Canyon
Object: follow the canyon to the Nali Castle.
Follow the route round and step onto the boat. Shoot the mooring and enjoy the scenery. When the boat stops, walk past the windmill and up the hill. Continue through the archway.
Area 28
Nali Castle
Object: gain entry to the tower and duke it out with the Warlord.
Run up the hill and enter the castle gate. Open the door on the left and enter the hall. Stay left and go through the opening into the Great Hall. Jump down and head round to the right into the chapel.
Go up to the podium and push the button. Leave, turn left and go outside. Walk down the slope and take the stairs down. Open the door and take the lift up.
Take the next lift and turn left. Go up the stairs, cross the two stairwells and turn right towards the balcony over the Great Hall. Return to the red carpet of the entrance hall. Go up the ramp and turn left. Follow the corridor and continue round and up. Search the bedrooms for goodies and step into the inner courtyard.
Walk up the large ramp and enter the tower. Follow the Nali to a Secret Area. Climb the long spiral staircase and pop the giant gasbag at the top. Go back down to the dungeon area. Release the prisoners by pushing the lever; kill the Skaarj strapping a Nali into a guillotine. Enter the nearby passage.
Area 29
Castle Warlord
Object: splat the Warlord.
Go up the walkway and get close to the Warlord. Let rip with the assault rifle close up, then step back and use the mini-gun or stinger. Forget rockets - he dodges them too well. Once he's dead, the doorway at the end of the walkway will open up. Go through it.
Area 30
D Crater
Object: access the Mothership basement.
Push the button on your left and activate the lift. Go upstairs, keep close to a wall in the darkness and walk through the opening under the sweeping ramp. Touch the two panels to activate the generator and open up the rest of the area.
Go back and use the doorway that Skaarj troopers have opened. Summon the lift, go up and touch the panel to activate the teleport link. Once inside the Mothership, enter the lift to access the basement.
Area 31
Mothership Basement
Object: access the Mothership lab.
Follow the route round to the doorway. Enter the chamber and step onto the power source in the middle.
Area 32
Mothership Lab
Object: access the Mothership core.
Continue round and push the red button to summon the lift. Head down the corridor, ignoring side rooms. Climb the small flight of stairs and enter the chamber. Walk round to your right and hit the button to enable access to the teleport fields.
Go back and take the teleport directly ahead of you. Locate the research centre, climb the ramp and push the red button.
Leave and return through the teleporter. Head round to your right and step onto the lift. Walk across, along and open the door. Step onto the black square to raise a flight of stairs. Go up, open the door and push the button. Head back to the lift and cross the new walkway to the door.
Area 33
Mothership Core
Object: access the Skaarj generator.
Take the stairs then ride the lift. Enter the door on your right and head for the pulsating room. Follow the ledge around to your right and dispatch all the Skaarj that attack you.
Once all enemies are dead, the locked door at the end of the corridor will open and you'll have two more Skaarj troopers to deal with.
Go down the steep ramp and follow the route along. Use the lift and follow the corridor to the room with four raised beams. Walk across the force field and touch the security access panel. Turn round and head for the security post. Ride the lift up. As you get off the lift, head right and push the button.
Go back down and cross the new bridge to the other side. Push the button and head for the room with the raised beams. The core access door will now be open -head through it.
Area 34
Skaarj Generator
Object: destroy the generator.
Enter the generator room, grab the searchlight and fight off the Skaarj attacks. When they're all dead, a Warlord will set about you with his homing rockets. Once he's dead, a lift will lower and you'll be able to go up to the three power cells. Destroy them with rockets, go back down and then leg it to the edge of the room. Turn on the searchlight and go back the way you came in.
Area 35
The Darkening
Object: activate the back-up power source.
Follow the corridor round to the right. Drop down the shaft behind the stash of goodies. You're now in the Mothership lab.
Keep to the right passage to reach the core. Take the central lift, turn right and then left, and go down the small flight of stairs. Locate the steep ramp down and follow it along to the lift.
O Skaarj pupae are everywhere - splat them with rockets. Once upstairs, head left and kill the formidable Ice Skaarj. Follow the right-hand passage and walk up to the hologram console.
Return to the previous room, and walk along the raised trench to start the back-up power generator. Step through the doors.
Area 36
Source Antechamber
Object: find the entrance to the Source.
Enter either door and walk around to the button; this opens the bars blocking the elevator in the entrance room. Ride the elevator up, walk along and drop through the hole to enter the Source.
Area 37
The Source
Object: bludgeon the Skaarj Queen to death with a toffee hammer.
Enter and kill the two Skaarj. Find the cool door and wait for the Queen to appear. She will use invisibility, invulnerability and force fields to shake off your attack. Use your energy amplifier and pump everything you can in her direction.
Circle her quickly to avoid her attacks; she always leans back and shrieks before doing so. Kill her and you've won!
Unreal, a 3D corridor shooter containing rich graphics and intense action, may turn out to be very real to Quake gamers ready for more first-person gunning. In Unreal, you play as a prisoner who's freed when his ship crash-lands on a hostile planet. From there, you embark on a first-person battle for survival as you pick up weapons to use against an onslaught of monsters that are also shipwrecked. One of the game's notable features is its continuous stages, Instead of employing a level-by-level approach, Unreal blends together all the levels without interrupting game-play The game also utilizes Intel's MMX processor to provide enhanced graphics and light-sourcing effects, such as casting shadows, well have more on tnis game that GT is dubbing the "Quake killer."
For months now, Unreal has been pegged as the Quake II killer. But despite Unreals great graphics and a few clever twists, id's corridor blaster definitely retains the edge when it comes to sheer excitement.
Live Free or Die
Unreal's story ranks as one of its best features.A captive on a prison transport you receive a second chance at freedom when your ship crashes, leaving most everything and everybody in ruins. And even if you survive what lurks on the hostile planet, can you escape?
As single-player experiences go: Unreal is topnotch. Cool, elements include gorgeous alien architecture, atmospheric effects such as fog and blackouts, and a clever en-mv A.I. (enemies roll out to avoid your shots and the deathmatch bots know how to play the game all too well). Unreal's one-player game is more engaging than Quake II's, by far.
A Mixed Fraz
In the long run, however, there's a lot wrong here for a title that's been in the works for about two years. The visuals are stunning--check out the water, transparency, and corona effects--but most of the gee-whiz elements are shown off in the first level, and some glitches in the 3D-accelerated textures interrupt the flow. Unreal's control is responsive and. like Quake II's, completely customizable. Ire sound effects are okay, but the music loops too often, and it's not terribly driving to begin with. Unfortunately, there's nothing new to the gameplay, and the pace isn't the frantic fragfest Quakers have come to expect--the single-player levels take forever to load and the multiplayer game is buggy and slow. So aside from a few neat puzzles, Unreal's just your standard corndor shooter.
As for firepower, Unreal contains some creative weapons, including a ricochet razorblade launcher and a shrapnel-shooting flak cannon, all with two firing modes. Unfortunately, they don't pack much power. Similarly, the cool-looking enemies are smart, but there are only about six of them.
Facins Unreality
I he gang at id released a half-dozen updates before Quake II was considered complete, so it's only fair to cut Unreal the same slack until its patches arrive. But after a two-year wait, you'd expect the game to be more polished out of the box. While you await those fixes, enjoy Unreal's intense and visually vibrant single-player experience.
ProTips:
- One of Unreal's coolest multilayer tricks lets you feign death by tapping the F key. You'll fall down, and though you can't fire, you can look around and plan a surprise attack.
- Keep the amphibious Strife on dry tand; they have the edge m the water.
- The flak cannon is effective only during dose enemy encounters. One point-blank shot, however, will kill an opponent instantly.
- Up close, the Skaarj attack with claws; from afar, they shoot energy balls and dodge your shots. SUB, you 'll stand a better chance of survival if you keep your distance.
The hype is still building over GT and Epic's Quake killer, Unreal--and for good reason. A recent demonstration of the pre-alpha game in action was nothing short of stunning. Killer visual effects, like colored lighting and transparency, reside in the software, so you don't need a 3D card to be blown away. Innovative elements abound, like upgradable weapons, health power-up plants that grow during multiplayer games, exceptional enemy A.I., and the easiest level editor ever created. Amazingly, Unreal is starting to live up to its name. Can Quake II compete?
Snapshots and Media
PC Screenshots


 Battlezone II: Combat Commander
 Codename: Eagle
 Delta Force 2
 Hexen II
 Hidden & Dangerous
 Medal of Honor: Allied Assault
 Return to Castle Wolfenstein
 Serious Sam: The First Encounter